
Today’s post will teach you the specific steps to grow a cutting from a fig tree.
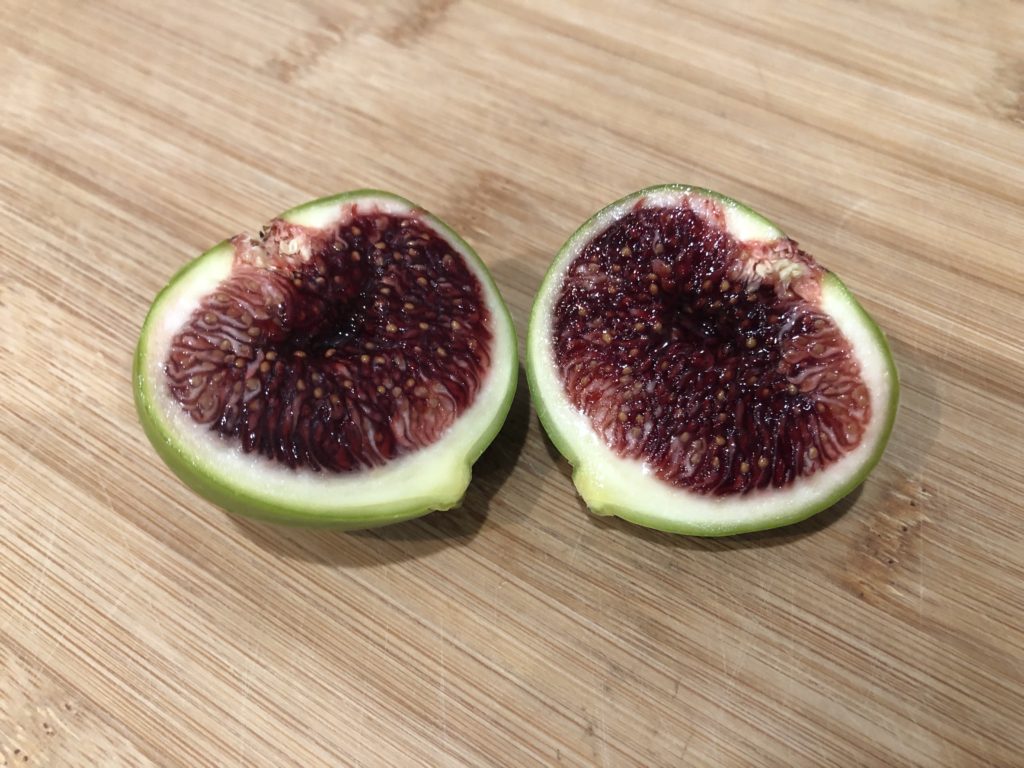
As you may have read in a previous post, my wife and I currently have two fig trees on our property. I think that one of the trees is called an “elephant ear” fig tree, but the other tree is a mystery. It produces small firm figs that change from a dark green to a lighter green as they ripen. When sliced open, the interior is dark red in color. The texture of the pulp is like jelly, and flavor is intensely sweet with a touch of mint! Because of this, we fondly refer to this tree as our “jelly fig” tree.
Note: this post contains affiliate links. Please read my full affiliate policy.
Prior to moving to our current house, I had never tasted a fig like this. It’s by far the favorite fig in my family, and throughout the summer, we hover, poke and prod the figs as they develop and slowly ripen. I’m not sure if it’s the advanced age of the fig tree, or just a quality of this type of fig, but the figs do seem to take their sweet time to grow and ripen. For each fruit that the jelly fig tree produces, our elephant ear fig tree seems to produce five. The elephant ear figs are getting better with each year of growth, but they definitely don’t have the intense, minty sweetness of the jelly figs.
So out of desire to have more of these delicious jelly fig trees, and also concern that this tree might be on its last legs, this summer I decided that I wanted to take some cuttings from this tree.
By using the cuttings, I have been able to create all new fig trees!
Here is a guide on how to do this, as well as links to all the materials that I used to create my baby fig trees.
Guide on how to grow a cutting from a fig tree
Create the special potting soil
- In a small pot, mix together a 1:1:1 mix of sand, peat moss, and perlite.
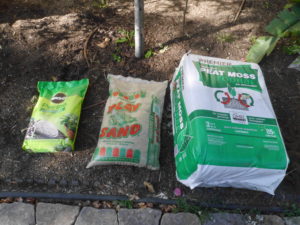
- Peat moss is a sterile, dried form of moss that is great at retaining moisture
- Perlite is essentially popped glass, which is also fantastic at retaining moisture and nutrients.
- Sand is just sand, and helps with water drainage. (You should probably use coarse sand, not the finer play sand I have pictured here.)
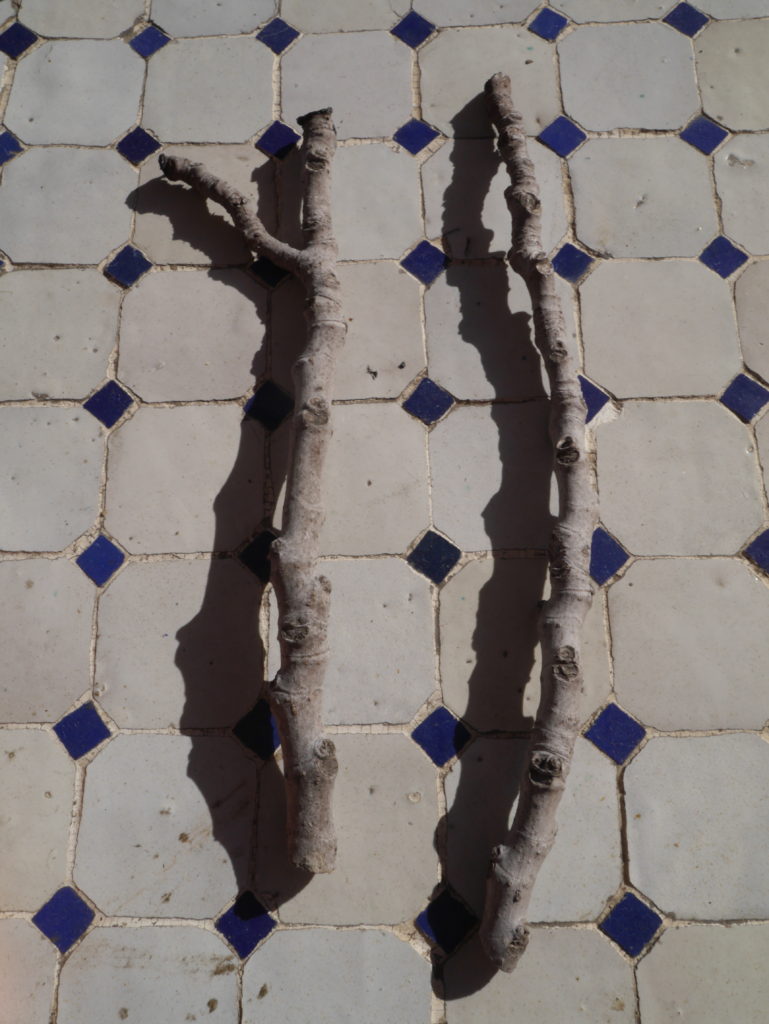
Select the cutting

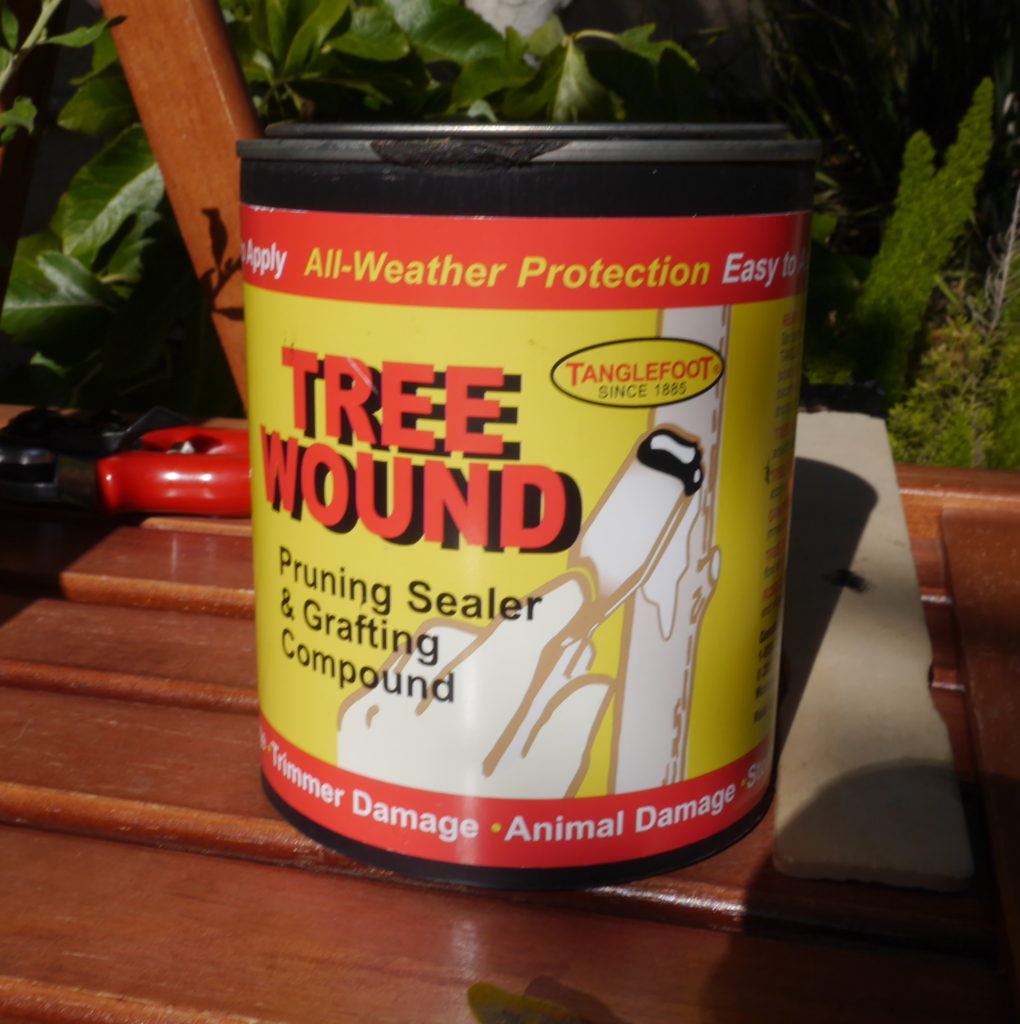
Select your branch Ready your shears! Seal cut ends and prevent disease
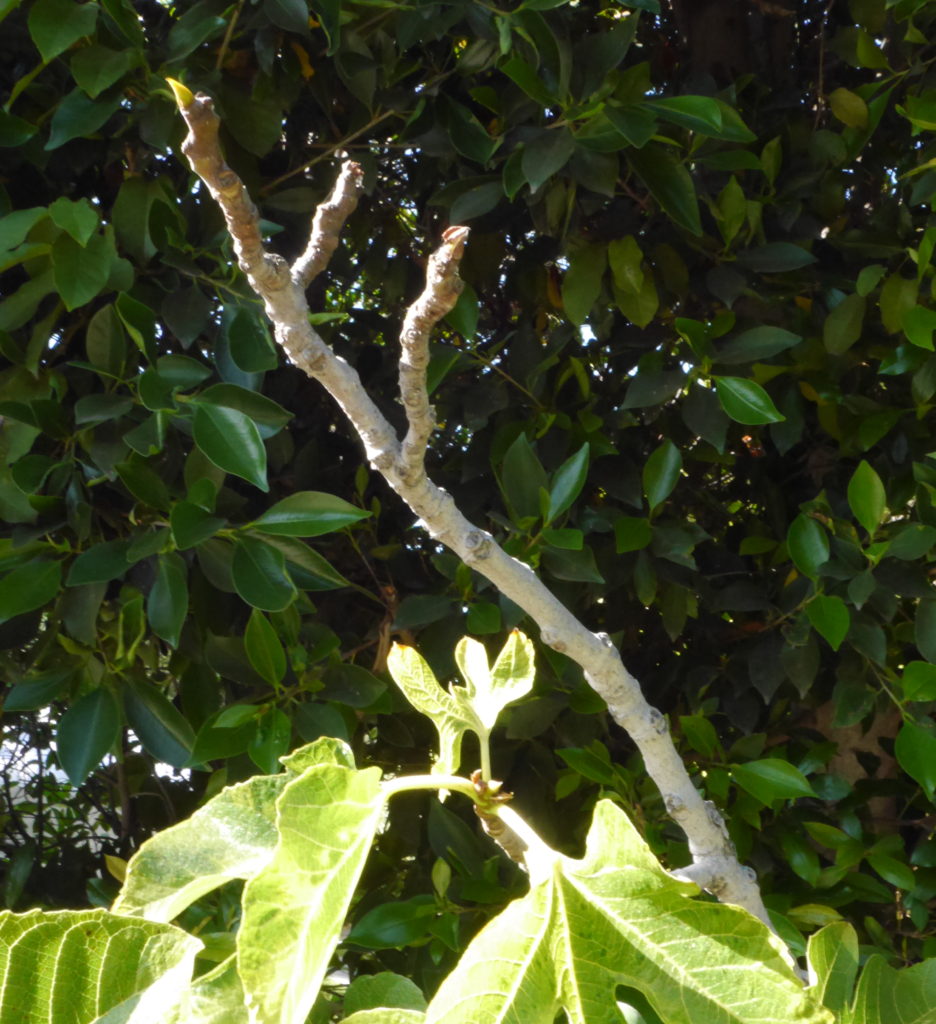

- Using clean, sharp pruning shears, cut off the end of a branch that is at least ½ to 1 inch at the thickest section, and at least 12 inches in length.
- Coat the stump in tree wound paste to protect the tree from disease.
Prepare the cutting
- Completely trim off any existing leaves and buds.
- This allows the cutting to concentrate on forming new roots, rather than growing existing leaves.
- Remember to coat the trimmed areas in wound paste to prevent disease.
Dip it in rooting hormone
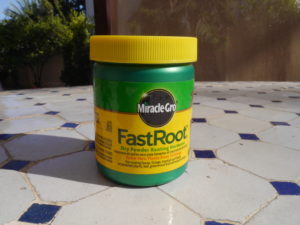
- Trim the bark off the bottom one inch of the cutting.
- Immediately after trimming off the bark, dip the still moist end of the cutting into rooting hormone (powder or liquid). [critical step]
Plant the cutting

- Sink the cutting deeply into the special potting soil you created, ensuring that at least 4 inches of the cutting are covered in the soil.
- Water to saturate the soil.
- Cover the cutting with a plastic hood to create a mini-greenhouse.
Water and wait
- Move the cutting to a warm, partly sunny area and water the soil deeply but sparingly; just enough to keep all the soil moist.
- You’ll know the cutting has “taken” when you see new leaf buds forming.
Transplant
- Consider transplanting the cutting to a larger pot when there are multiple fully formed leaves.
- Let the cutting grow in the pot for at least one year before planting it into the ground.
Do you want to see how well this worked? Go here: They’re alive!
— TDD
Links to products used:
Home and Garden
- First fig of the summer | 2021
- Autumn garden update 2020: Potatoes, peppers and tree pruning
- The Darwinian Doctor’s most important investment of 2020
- A Darwinian summer of cake and salad
- First figs of the pandemic
- Childcare in the age of COVID-19
- Figs and finances
- The Darwinian Doctor hacks date night
- Gratitude and Thanksgiving in 2019
- Autumn Garden Update 2019: Tuscan melons!
- Picking chestnuts in Seattle (a horse chestnut warning)
- First figs of the summer | 2019
- Kids play structure complete!
- Fig tree and garden update | Spring
- State of the blog and update on the jelly fig plants
- Children’s book recommendations for the young scientist
- How to prevent keyboard marks on your laptop screen
- Update on the Jelly Fig cuttings: They’re alive!
- How to grow a cutting from a fig tree
- First Fig of the Summer!
Want to support the blog?
- Join our investor club at Cereus Real Estate
- Visit my Recommendations page
- Check out my wife’s food blog: Eat Dessert First
- Check out my TikTok channel
- Follow me on Instagram
- Follow me on YouTube
- Contact me with questions


Growing a cutting from a fig tree can be a rewarding and relatively simple process. Start by taking a cutting from a healthy, mature fig tree during its dormant season, typically in late winter or early spring. Choose a cutting that is about 6 to 8 inches long, with several nodes, and remove any leaves from the lower half. Dip the cut end in rooting hormone to encourage root development and plant it in a well-draining potting mix. Keep the cutting consistently moist, place it in a warm and bright location, and cover it with a plastic bag or dome to create a humid environment. Once roots develop, usually in a few weeks to a few months, transplant the young fig tree into a larger container or directly into the garden. Regular watering, sunlight, and patience are key to successfully growing a fig tree from a cutting.